Beginner's Guide to Lino Printing
Learn the art of lino printing and create stunning prints at home!
Lino Printing Tutorial
Follow our step-by-step tutorial for a guided introduction into lino printing. Whether you have one of our lino printing gift boxes or you have your own equipment, this easy guide will take you through the steps to creating your first beautiful print.
Before you do anything, clear a space and put down some paper to protect work surfaces, then lay everything out in front of you so you can see what's what. You will need:
Carving tool
Lino sheet
Roller
Ink tray
Printing ink
Palette knife
Blank printing card
Design template
Carbon paper
Make yourself a nice hot beverage and find somewhere quiet to sit and read through these instructions.
(I recommend you read through all of them first and then follow them one by one.)

A few things to note:
You can draw directly onto the lino if you want to but if you'd rather draw onto paper (like I do), then carbon paper is one of the easiest methods of transfer. One piece can also be used several times and the ones in the gift box can either be cut down to size or left as A4.
Remember that the final print will come out in reverse. If you have our gift box, the templates have already been reversed for you, or are symmetrical and don't need reversing. They are printed in green so that when you trace over, you can see your line easily. If you are using your own image an easy way to reverse it will be like this:
Turn it over so it is face down and place it up against a window. The light shining through from outside will make it much easier to see than doing it flat on a table.
Then place a second piece of paper over the top and trace the image onto it. This will give you a reversed image. Then follow Step 1 above to get the image onto the lino.
Smooth, lighter paper works best for hand printing onto. Textured and heavier papers can print unevenly and generally require more elbow grease! But if you use a printing press, all paper types should be fine.
Before applying ink to your lino, check that your lino is clean and free of any loose bits of carvings.
A note about your ink tray. The ink tray provided in the gift box is plastic and as much as I try to avoid using plastic, I think it is ok if it will be used over and over again. These ink trays are great for starting out and they do the job, but a nice, heavy piece of glass, about 40 x 40cm is what is traditionally used and is perfect for inking up so be sure to look out for one for when you go pro!
If making your own colour, check it is mixed properly before inking up your lino, You can also mix it using your roller in different directions, not just with the palette knife. Of course, if you are experimenting with colour, you don't have to make a solid colour, a blend will be really interesting and every print will be different. Forget the rules and go crazy!
When inking up your lino, it should sound 'tacky' when the roller goes over it. Once you've done it a few times, you will get a sense of what is the right amount of ink.
When printing, depending on the paper, you will have a front and back (especially evident if watermarked). You will want to print on the front which is sometimes smoother. With cartridge paper it shouldn't make too much difference which side you print on.
When printing, you may want to make 'registration marks' to show where to place your paper so that it is central (or wherever you want it) on the page.
You can make these like this: Before inking up, put down a blank sheet of draft paper. Then put down your printing paper (either side up, this is just for taking measurements), and lastly place your lino on top. Either by eye or using measurements, find the best position for your lino on the paper. On your sheet of draft paper, mark the position of the lino and the print paper and use this to position them every time you print.
This is by no means essential, especially for smaller prints, and when you are starting out you may not want to worry about this.
When you have finished, clean everything up with warm, soapy water - wet wipes are great for this bit - and store back in the box or in a drawer where they won't get dusty as this will save you having to clean them all when you next use them!


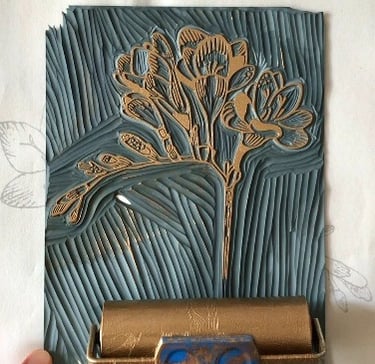


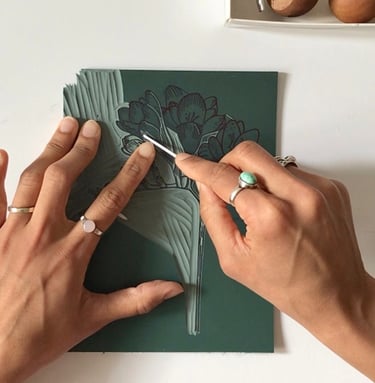

3) Carving! This is my favourite bit. Now that you have your reversed image drawn on your lino, carve away the areas that you have left blank so all that remains is the image you have drawn in pen. The pen marks will stay on the lino and will not affect your print.
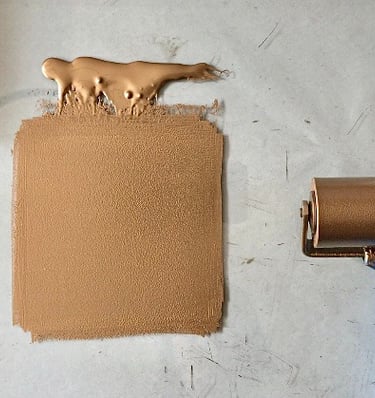
4) Rolling out your ink. Using your palette knife, put a small amount of ink onto your ink tray or palette (something like a level teaspoon). If you would like to mix your own colour, use your palette knife to do this. Then roll it out so there is a nice, even coverage on your roller.
5) Inking up. You're nearly there.. With your roller, roll the ink onto the surface of your lino. Check that the area you are printing is fully covered with ink. Remove any unwanted ink from your lino using a damp cloth.
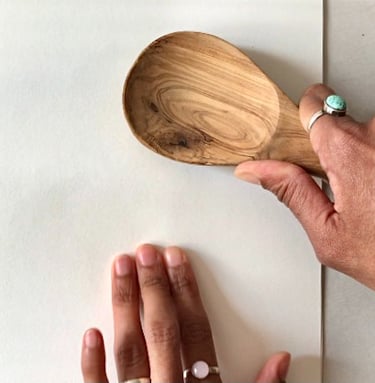
6) And finally.. Printing. Place your blank printing paper face down onto your lino. In circular motions use the back of a wooden spoon to apply pressure until you have covered the whole area. Do have a little peek before lifting your paper off to check for patchy areas. When you are happy you have captured the entire image, carefully lift off your paper et voila, behold your beautiful print!
If you are printing more than one, repeat steps 5 and 6 and keep going until you run out of something!
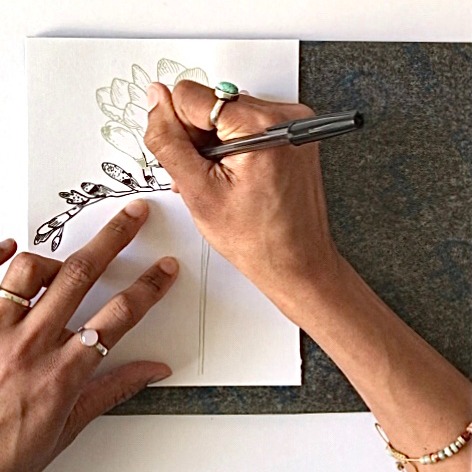
1) Transferring the image from paper onto the lino. Place the lino down on the table in front of you. On top of it place the sheet of carbon, black side down and then your image, face up. Trace over the coloured bits of the image using a pen or pencil - I find biro works well. These lines will make up your image, the rest will be carved away. You may want to check after doing a couple of lines and if it is quite feint, then press a bit harder.
2) Darkening the image. Once you have traced over the whole image, check how dark it is on the lino. If you think it needs it, go over the image on the lino using a pen. (I always do this as it makes carving easier).
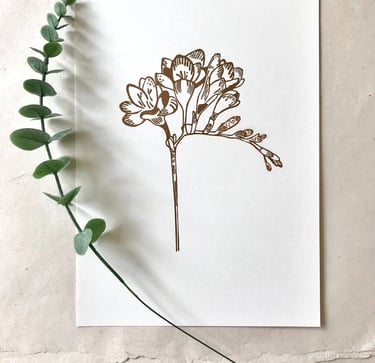

Remember to use your free spray adhesive. It will ensure the print stays flat when framed and will keep it looking its best for as long as possible! See how here.
